I will not write much here because there is not much to write. A picture says a thousand words.
The methods of installation mounting used are just standard methods. I just thought there are people out there who need to know how to do it or how it is done for one reason or another.
Picture 1 – Motorized overhead projector mounting

===== RELATED ARTICLES:
===========
This mounting has been done for my approval some time back. The location was inside a large (about 100 pax) meeting room for a high rise office block.
The unit in the picture was a mock-up unit so I could check it. Actually the sizing of the mounting bolts, the hanger rods and all metal works were all done by guesswork by the contractor.
But they oversized everything so much it made me speechless. The stingy contractor became very generous that day.
However, I knew the projector unit to be installed was very expensive. So I guess the contractor did not want to take any chances.
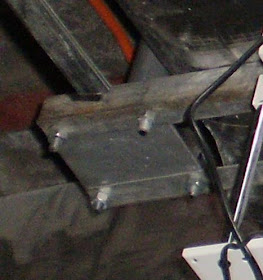
Notice that two hanger rods were used. They were larger steel pipes actually. Each was welded at the top to a thick steel base plate with four mounting screw holes (see Picture 2).
Picture 2 – Hanger rod base plate

The lower end of each hanger rod was also fixed with a similarly welded base plate which is used to fix the projector mounting plate (Picture 3).
Picture 3 – Bottom base plate

Picture 4 shows the whole assembly for one hanger rod. I separate it here so everybody can understand.
Picture 4 – One hanger rod assembly

The projector rack unit in picture 1 is what people call motorized projector.
It is actually not a motorized projector. It is the projector rack that is motorized.
You can put any projector there as long as the projector size can fit into the rack size installed.
The motorized rack is used so that the projector unit can be concealed into the ceiling when not in used. I took a few pictures of the completed work where you can see that the whole unit is totally recessed into the ceiling but I do not seem to be able to find them.
I will upload those photos later.
I have said enough about the mounting method I think. Notice also the cables hanging around the projector rack in Picture 1. Those are the rack’s power cable and the temporary supply cable to demonstrate the operation of the mock-up.
I approved the sample and about thirty unit of these motorized projector units were installed throughout the office building.
Picture 5 – Closer view of the motorized projector rack

Picture 6 – Another angle of view

See this post, Electrical installation pictures, for more pictures of electrical building services.
Copyright http://electricalinstallationwiringpicture.blogspot.com How to install overhead projector
No comments:
Post a Comment
Note: Only a member of this blog may post a comment.